Was primarily a college work blog, but now that I have finished for the year, it will show more of my own work.

Thursday 13 May 2010

chrome material base


http://hidlen.deviantart.com/art/WEDDING-RING-71551313

i found this tutorial that shows howto create and texture some wedding rings, the modeling wasn't helpful but the chrome texture did as i used it on my safe.

I used the settings i found here as a base and modified the texture to suit my needs by adding a radial reflection, and changing the base colour to black for a shiny black metal.

thursday night


It's the end of thursday and it looks like i should be ok to hand in on time. i have complete my animation, my model sheet, my storyboards and everything else i planned to in my time plan, but it's taken a lot of time.

my cinema 4D crashed during my final render so ill have to settle for a lower quality one, although i did alter the lgihting to make it look as good as i could.

my time managment this week has been very good, which is a change, but i did plan to do a lot of work.

Wednesday 12 May 2010

lemony snicket - unfortunate events


I decided to look at this video of the film by lemony snicket, a series of unfortunate events. The environments and setting of this film were originally what i wanted my character to be set in, and i wanted him to have an excentric was of acting like the charactrer count olaf.

heavy rain video


As i looked at heavy rain in my character aniamtion research i thought i should add a video showing some of the character aniamtiont o my blog. Heavy rain is a game for PS3 about a killer and shows the story from several different peoples perspectives, a victims father, a Private investigator, a newspaper editor, and an FBI agent. The games story is very character driven and to ensure this is top quality they made their voice actors go through every scene in motion capture to make the movements as realistic as possible aswell as motion capturing every voice scene/conversation.

The charcters are quite well done, and the story is very interesting, the characters express themselves well but the fbi ages constantly looks confused when i think the expression they were going for was thinking.

other than that the character modeling and aniamtion are brilliant, but the voice acting isnt great, and kind of throws off the realism of the characters.

video collection of 3d character work - youtube


i found this video which has a colleciton of 3D character work, which all varies in quality. Most of it is quite good, but the first aniamtion shown i feel the texturing is quite bad, the colours are too bringt and done work with the background aswell as having no real shadows or self shading. There is some aniamtion of the hulk there two which i assume was from a game gameplay cutscene, which although brief looked quite good with what i would concider several years old graphics for a currect generation console.

The last aniamtion they is seen is my favorite and why i added this video, the character looks well made and is textured well, he has soft shadowing which i guess is some kind of ambient occlusion. His movements are smooth and his arm and hand seem to move well and smoothly which makes me thing his hands are rigged with bones. his facial features are my favorite part, large parts of his face move as he talks and his jaw and the whole lower part of his face move side to side as he speaks which i like and would like to find otu how it is done.


I foudn this aniamtion and decided to post it. I think the character design of the blue goblin is quite good, and the face has some nice complexity to it. the aniamtion runs to a soundclip of the film 300. The models might be ok, but the animation, esspecially to start with, is jumpy and doesnt look right at all to me, and the movements dont flow well and dont have speed or strength behind them, and there is no follow through on movements.

The facial expressions dont change much and the talking look quite bad, the mouth movement is simple the jaw being lowered with very little movement to the lips or mouth shape, other than it being stretched outward to make it smile.

I really dislike the camera work as it moves at the rate the character does as he moves around which takes even more out of the speed and power of the movements. this might be because he was trying to keep it as much like the film 300 as possibl ebut as there are no background elements and no oponent it it just looks wrong.

another mecha


I decided to look at another mecha model as a comparison, this one is much less complex and has a lower polygon count, but i feel its not much worse, the design is less generic, more original and has better proportions, for those reasons i prefer this one, but if i had the choice to model either of those myself i could combine their different qualities, the design and inventive legs of this one, but the detail and exposed pistons and cables of the last one.

mecha model i found


i found this mecha model someone has made, i liked the complexity in the modeling. The model is very complex and looks quite good, but it looks quite old fashioned for a mecha, and kind of out of proportion, i think it might be a bit too wide based on how thin it is from a side view.

spider robot aniamtion


I found this animation of a spider robot with 6 legs. I love the quality of this work, the motions are very smooth and there is no unintended, sliding as it moves. The robot was made a rigged up using 3Ds max and was rendered with an external renderer called brazil, which seems to have added the ambient occlusion effects. I think the ant-aliasing settings in the renderer must be quite high as it looks nicely defined and has a high resolution even on youtube.

samsung 3D LED tv ad


I loved this advert for the new samsung 3D led tv. I think its very nicely made, with some impressive effects, 3D work, composited effects and post productionwork.

bitey or brackenwood - prowlies


I have looked at adam phillips work several time for college research and his characters always come back to me as they are well designed, they dont talk, but express themselves through well aniamted movements and facial expressions. bitey (a strange horned, humanoid character) shows hes happy with a sinister smile, which i felt related to my own character design.

The creator gets his personality across well showing that he is a mischiveous creature, that uses his impressive speed to mess with other creatures in his forest.

Mask animation


I found this animation a long time ago on newgrounds.com and liked the character work and more importantly the aniamtion. The creator, jeffrey liu, said at the time it was made for a film festival, and it was unfinished, but i think the concept/ rough style really makes the animation. I love how each frame is drawn and is very accurate.

Although there is no dialogue and the character is unknown i think the character himself is quite well done and has a strong presence and impact.

lego men expressions


I found this video when looking for reference on character expressions. I think that legomen express themselves reasonably well, with such limited movement. Their facial expressions are done using 2D textures placed on their faces.

morph tag testing


I rendered out a demonstration of all my morph tags, i think they all look quite good and express the emotion they are supposed to quite well. the face uses 4 morph tags to make verythign move at one, 2 on the teeth, 1 on eyebrows, and one on the main face mesh.

The facial expressions are a little fast but i wanted to keep the rendering and uploading times down. the face goes from default which is happy, to sinister, then he does some eye motions, then angry, shocked, sad, scared and back to normal.

The hands are simply manipulated to move in stages to reach their end goal.

morph tags - hands

I added the morph tags for the hands next.

Since morph tags to keep the length and sie of the polygons the same as the default the movements can stretch the polygons in annoying ways, which is why you add tags in different stages of the movements.

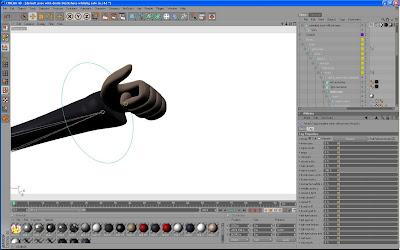
i added tags so that the hands can open and close, the thumb cane move too.

The main tags on the hands for me are that tags i added to allow the character to twiddle his mustache.

I added an extra tag to move his thumb and finger to make a twiddling action.


Adding morph tags - facial features

I started adding morph tags to my character, I started with facial features.

I added morph tags by clicking morph in the charcter tags dropdown menu. Adding morphs is quite easy, you add a tag and then alter your mesh to that point you want it to move. This is best used for faces as on other things it can produce unwanted movements and polygon stretching.


I added several exressions to my charcter, happy (default face), sad, angry, shocked, scared, and one which i call sinister which is a slightly more evil version of his default face, which is what i plan to use in my animation.

I added morph tags to the eyebrows and teeth to match the expressions i made for the face.


full model still render

I rendered out this still of my full finished mesh.

I'm quite pleased with the final result, the texturing could have been better but i feel its good enough.

the face is quite good but because of a slightly awkward polygon arrangement in places it was difficult to morph tag.
I made some textures for the dynamite.

The red texture i made usinga red colour, specular is turned down slightly, and i found an appropriate bump map which turned the strength down.

I made a spark texture by placing the fine shader in the alpha and colour channels, and i turned the glow channel on and increased the strength to make the spark i wanted.

Added dynamite

I modeled a stick of dynamite which i need for my aniamtion.

I made it simply bu dropping a sized up cylinder into an array. I added the string with sweep nurbs which i place din another array.

Finished safe model


This is my finished safe rendered out, it looks pretty much perfect to me and im pleased with it, esspecially the reflections and materials i used on the dial. I did want to add numbers or notches to the dial but i felt that wasnt needed.

Modeling safe

for my animation i decided i needed a safe as an asset. I modeled this quite simply.

I started by making a cube, which i then smooth shifted to add a extra polygon as a slope around all the edges.

I then used the inner extrude tool to make the crease for the door. I used the knife tool to cut a line round the door to make it look more realistic.

I then used the extrude tool to bring it in a bit, inner extruded again, and extruded once more to make the door.

After making the basic shape for the safe i added hinges on the side of the door, which i made by smooth shifting a cube and placing it in a hypernurbs object.

I made a safe dial by manipulating and extruding a cylinder.

i made the handles in the same way as the dial, but i used an array to make the 3 bars evenly spaced.


To finish it off i needed to add textures, this took a bit of testing, to find a suitable shiny metal/chrome texture i looked online at some tutorials, and adapted the textures i found to suit what i wanted.

i made the textures for the dial using different gradients, on vertical one, and one radial, the rest of the dial was a black shiny metal texture i made which i tried to blend in with the shinier gradient parts.

Character rigging finishing up

to finish up the character rigging i arranged the different parts of the face so they could be morph tagged.

And i dropped all the parts of the head and face into the head joint. I tried binding them to the joint, but this gave some undesired results and just putting them in the head joint worked perfectly.

I added eye controllers to controlls the eyes. and thats everything for rigging my character except adding morph tags.

character rigging weight painting


The weight painting process is when you use the weight tool to tell cinema 4D which points are affected by which bones.

To ensure proper movement i did a bit of testing around the base of the spine area to work out which points whouch be controlled by the legs and which should be controlled by the spine joints.

The tail of the jacket what hangs down i decided shouldnt be influenced by the legs and the give some strange stretching problems.

The points in the top of the legs go quite high into the torso so i had to mess around with it a bit to make sure the top of the legs didnt stretch out of the back when he crouches down.

I made the neck join affect all of the jackets collar, as when the shoulders, head, or other points affected these points it stretched out in undesired ways.


character rigging heirarchy


At this point all that was left to do with the bone chains and controllers was order the heirarchy so everythign worked properly.

I also grouped all the bones, the controllers and the mesh into seperate null objects.

I changed the colours of the controllers to make things easier and i added colouted squares to the object manager to help tell me what is what and allow me to select a particular group or type of object when i needed to.

character rigging tests

At this point the bones are all finished, so i tried binding all the bones to the mesh and testing it a little.

I stuck mainly to the auto weighting and did very little alterations with the weight tool at this point.

From what i saw at this point everything worked well and i was happy to progress.

Character rigging arm

To rig the arm i started by adding the bone joins using the join tool. This is quite stright forward witht he arm and is easier than the legs.

As with the other parts of the rigging i added a spline as a controller.


After adding the controller i set up the IK chain which in the case uses a pole and a goal to govern which directions the arm can bend and at which point, or points i can pivot.


For everything to work properly the objects had to be aranged properly in the heirarchy. This was shown in the handout which order things are placed.

XYZ animation


A few briefs ago i made this animation. It was for a brief in which i had to make an animation based on the letters X , y and z. I think i did a reasonable job, but im not too happy with the concept itself. i think the camera work is ok, but the animation in some places looks a bit off, this is because i used a heirarchy to animate and this wasnt helped by cinema 4D's automatic slow in and out aswell as its animation spline smoothing, i turned it off in places to make a more realistic animation though.

As for the timing, i think its ok throughout but at the end when the explosion happens i think it could do with a re-shoot.

The keyframes on this animation i feel are spaced out too much. The aniamtion is supposed to be slow paced to show the mecha's size, but i feel it drags out too much, in most scenes the keyframes are spaces around 30 frames apart, i feel this is far too much, and i should lower it to around 20 frames apart, which would place the keyframes i used in scene 6 would be placed at frame 0, frame 20, frame 40, frame 60 and so on.

Character jumping rig test


As a quick test i think it looked good at this point. The binding works at the right points, but it will be weight painted better when the bones are finished.

Character rigging spine binding tests


I tested out my rigged up character so far. I made him jump as it would text all the bones i have added and bound so far.


I think it looks good as a still render, but i rendered out the animation too.


Character rigging spine


Rigging the spine was quite easy, i started by adding 5 joints using the join tool, which maked 4 bones. I found it easier to make one single bone, which i then split up by holding ctrl and clicking the middle of the bone.

To ensure fluent movement i added a spline to go inside the spine bones. The spline has one less point than the bones. I used snapping to make sure the spline was at the same co-ordinates at the bones.

Next i added Some controllers as i did with the foot, but for the spine there are more to give as much movement as i should need.

I added an Ik tag to the spine base joint, and put the controllers inside it, which affect different joints up and down the spine.

The head join is constrained to the neck as it needs to affect the head without affecting the neck and vice versa.

character rigging, leg bound test

I repeated the leg rigging process for the opposite leg using the same method.

After rigging both legs i tested them bound to the mesh to see how it would look and how it works.

I did this by selecting all the leg bones along with the mesh, and then clicking bind in the character drop down menu.

The auto weighting feature of cinema 4D automaticly weight paints the points around each joint, this was good enough to test the legs for now.

character rigging foot controllers

To make the foot foll slider work i needed to use xpresso which is a node based programming editor. In xpresso i followed the handout and added a user data with the appropriate name, minium angle and maximum angle. Then in xpresso i dropped in the all neccesary objects and values and joined them all together, this adds a slider to the foot controller which can be used to make my characters foot roll forward on the ball of his foot and tip back on the heel.

Character rigging - legs

Next i added a controller to the leg which is what i need to animate.

The controller is a rectangle spline lying flat around the foot. After making the spline, i added three null objects which are the points at which the foot will pivot when the foot roll is added.


The nulls are placed in a particular order in the foot controller heirarchy.

Character rigging

Rigging a character is the process of adding bones and binding them to the character mesh. Doing this allows you to move and animate a character in a much more realistic way that for example, using a heirarchy. Using a heirarchy to animate a character is very limiting, as more complex meshes wouldnt work, which is one reason you can use bones.

To start with i began by rigging my characters leg, throughout the rigging process i followed a hand out given to me by dave.

To rig the leg i started by adding bones at the appropiet points, i tried to get the points on the points at which i wanted the limbs to rotate. I was thinking about adding an extra joint where the knee is to create a smoother bending motion, but this didnt work how i planned and even if it did it limited movement in the leg because they seemed shorter.


Next i added an IK tag to the upper leg joint, and then placed the ankle join in the end field. Next i added a goal and a pole. The pole determines which direction the leg faces and how far is can move before it flips and faces the wrong direction. It also determines which angle the leg faces.

Tuesday 11 May 2010

SWOT anlysis and SMART targets - Digital skills

SWOT analysis - Digital skills

As mentioned in my swot analysis of the character animation brief i feel my character modeling skills are fine, and i created a mesh which i am happy with and looks good. and my weaknesses in modeling being complex shapes, keeping a low polygon count and a clean mesh.

creating my model sheet is definitly a weakness for me, from what ive seen while making my model sheet the different aspects of illustrator are quite simple and with some practice i think i could get my head round the program.

Smart targets

For this brief my meain weakness is illustrator, I plan to finish my model sheet tomorrow, but i may do a tutorial or two simply to help me understand some of the tools and features of illustrator.

SWOT analysis and SMART targets - character animation brief

SWOT analysis - character animation

I will go over my different strengths and weaknesses based on different aspects of the briefs which i have being doing over the past few weeks.

To start with when it comes to modeling my character i feel this is one of my strengths as i had no trouble modeling my character feel that it has come out better than i woul dhave hoped. The only problems i had on the modeling side of things were parts where i was slightly unsure about a cirtain aspect of cinema 4d or other things like that. For example the weld tool in cinema 4d was somthing i didnt know much about, but dave explained how it worked and it was that i didnt realise where you clicked and what needed to be highlighted for it to work. Most other things i managed to get around by trying things out myself or looking online.

I found the rigging part of the animation process very easy aswell. Following the tutorial given to me by dave i had no problems with any of the different parts of rigging. The only thing i would have liked to have knows was how to rig a hand using bones, which i didn't try as finding a suitable tutorial online was hard. The only thing close to a tutorial i found was in the Anne powers cinema 4D book, but at this point i had allready achived the desired results using morph tags. Weight painting was fairly easy, i had no real problems with this either, some things didnt work right off but changing some of the affected areas for each bone sorted it out. my character had a lot on polygons inside other parts of the body so i had to get the camera inside the character for some parts, which was awkward, and my set selection tags didnt work for weight painting.

The parts of modeling i mentioned above i feel are my strengths but there are one or two other parts which i think i need some work on.

Texturing my character was quite easy but i dont feel this is my strength, because my texturing is not as good as it could be, but the character himself looks fine with the textures i have used, with some changes to specular, bump maps, colour, reflection and other channels. I modeled a safe as a part of my animation, which i modeled with no problems but getting the metal textures right was hard, i looked at several tutorials online about which settings to use for different metals, and chrome coloured textures. I also looked at several tutorials nd board to make the background completely white, which after asking one of my peers turned out i did it in exactly the same way as him.

One aspect of modeling i dont think im too good with is creating complex shapes using the least polygons possible and creating the leats irregular faces.

As for animating my character, it isnt the area im best at when it comes to 3D work, but i think its good enough. Im not finished animating yet, but ive spent some time making a sneaking cycle. My timing needs some work and my way of going about smoothing out walk cycles could use could be slightly more informed.

These weaknesses mentioned above could be a threat to me in the future and for the small amount of remaining time i ahve left on this brief, but ill set smart targets to combat this.

SMART targets

I feel that i should set some targets related to texturing and complex modeling. As for texturing i'm going to look at some tutorials on texturing an mainly creating metal textures, hopefully gaining a better understanding of each channel in cinema 4D texture edit should help me make almost any texture i need to.

I think when it comes to complex modeling i plan to do some tutorials on making some more complex models with low polygons and keeping a clean mesh.

When it comes to animating i think that right now there arent many tutorials which would help with my current brief, so i plan to just keep tweaking my work till it looks how i want, by doing this i should get a better understanding of animation and bcome better at it.

Past weeks recap


Week 19th april to 25th april recap.

This week was mostly spent modeling my characters head.

On moday we had a taught session in the morning. In the afternoon i got my characters head shape right, added a chin, and began modeling the mouth.

On tuesday i finished the mouth when i final got a mouth shape i wanted, which took several appempts and i wasn't really sure if i was happy with it untill later in the day when i added a nose and some teeth.

On wednesday i modeled the eyes, which took me a while to decide on the positioning, and i made them by making several cuts to make an eye shape without creating too many extra polygons and irregular faces. I also made the ears, which again took my a while to decide on the positioning. but overall im happy with all the facial reatures.

On thursday aswell as attending a caad session on eye contorllers and making eyes using 2d textures, i made a start on making my characters hair. I had no idea of how the hair should look but i just went for it, and it turned out really well and suited the character.

The rest of the week was spent finishing my characters mesh and doing some paperwork.

This particular weeks time management was ok, i got everything i planned to done, which was finishing my characters head. Other than that my research and paperwork is where i fail on time management.