Was primarily a college work blog, but now that I have finished for the year, it will show more of my own work.

Friday, 31 December 2010

high quality still


Just thought i would upload a high quality still of my character which i messed around with in photoshop. I added some fairly naff steam to a still i rendered out of my character using HDRI lights, this was after i had rigged my character so i could get him into a pose/base stance.


Thursday, 30 December 2010

HP Sauce aniamtion

I thought i would quickly post the HP sauce animation mentioned a few posts ago. This version of it wasn't cut down how we wanted it, and didn't have any sound or after effects, but i think its ok and i learned some techniques while making it.


Still posed up character

Christmas break update

I thought i would update my blog since it's nearing the end of the second week off for Christmas. During this break i was supposed to catch up on the work for the first two briefs of the second year which i was behind on because of the work related brief. This hasn't gone exactly to plan, because i caught a virus and a chest infection the day after finishing college, and was unable to do anything at all until Christmas day. Regardless i started working on things as soon as i was able and will hopefully get everything done in time.

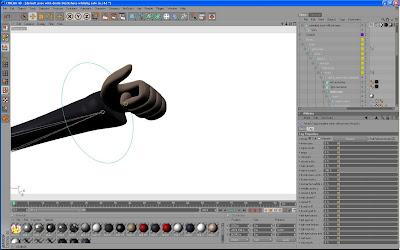
So far i have finished the rigging of my steam powered robot character which i has been waiting for a while now, and it seems quite successful so far. I worked out pretty much all of the problems i had with various parts of the rigging. For a start the character foot kept flipping upside down when the controller when in a certain direction, this is because of a constraint on the foot bone, but i fixed it and my method seems to have no problems of its own. After this i filled all the gaps between my characters fingers with rivets which i think look very good. I finally found a texture to use for my robots steam gauge and i made an indicator which is controlled by a slider. I reluctantly decided to use the split torso version of my character to give him better movement in his spine, which i wasn't too happy about because i think it looks worse like that, but after rigging it up and getting it in a pose i think that it looks fine. there were several more things i fixed or added, but those are the main things. Aside from that all i need to do to it now it align some of his pistons so they move in the right directions and squash and stretch as they should, and i need to add several gas/oil tubes using soft IK splines but that takes very little time. Now that my character is rigged though I'm going to create a second model sheet to go with the first one showing poses and expressions/features.

Thats enough of an update for now, i will upload a still of my character posed up too.

Monday, 13 December 2010

first two briefs of the year

For the first two briefs of the year which i have yet to complete, i thought i should work out what needs to be done, because the deadline may be earlier than expected. If what i have heard is correct and the deadline is wednesday, i don't have a hope of completing the work on time.

I still need to render out stills of my character and make my model sheet. I need to rig my character, and create some test animations. My storyboards need to be completed and script finalized. I also need to create a treatment for my idea and set that up.

These are things i know need to be completed, and I'm unsure if there is anything i have missed or don't know about, i will have to find this out in my tutorial today.

new brief

After completing the HP sauce animation, the next we we were due to start work on our new brief, in which we have to work in groups to create 3 idents from logos we were given, made by graphics students.

So far this brief isn't going well because the weather has made it hard to get to college, and i haven't been feeling well. Now I'm fine and the snow is melting, so i can actually get here and start doing some work.

I completed my storyboard ideas and the concept development sheet which i typed up in word.

Because of being behind for various reasons, and the rabbit animation, I'm behind on pretty much everything. I need to complete the first two briefs of the year which coincided with the rabbit animation for the work related module. I was informed today that the deadline for this work may be wednesday, which is bad because i have an enormous amount to do, such as rigging my character, and doing the test walk cycles and animations, not to mention the model sheet for my character (which shouldn't be a problem because i have the character made and backstory done, so it should be a simple case of rendering them out and putting them together.

So with everything i need to catch up on, today i need to create a time plan and find out the deadlines and other information about what needs to be done. I have already had a word with a member of my group and caught up a bit, so once i have a tutorial today we have decided to create a time plan for our work, and decide on the final concepts we will use from our storyboards.

Work with first year interactive media students


During last month we had a week in which we worked together with interactive media students to create a b-movie using various compositing techniques. The project didn't work out very well for out group as the interactive media students didn't help us as all, and me and Gareth ended up making the whole thing ourselves. Our idea was that a bottle of HP sauce grows to a huge size in an unusual accident, and then it starts rampaging the area, angry, because of people eating sandwiches with HP sauce on them.

In the end, we got the work finished, and it turned out ok, but because of limited time, and limited manpower the work wasn't complete. We didn't have sound in the final animation, and we didn't have many of the after effects that we wanted either. On top of that we couldn't cut all the scenes down to the right lengths so some scenes dragged on a lot, and some of the masking failed too.


rabbit animation still


This is a screenshot from the final render of the rabbit animation, i will upload a video of the final thing later, after i get a version with a reduced file size.

huge updates and recaps

I haven't updated my blog in a long time, this is because of various things keeping me behind on my work. I'm behind on pretty much everything and need to catch up badly, so to start with i will cover the things which have happened since my last update.

To start with, my group finished the rabbit animation for kurodragon. While finishing the animation we had various problems with rendering and the cape, which meant countless re-renders and various renders to patch problems. We eventually got the animation finished, but received a list of problems with the animation from stuart. Most of the problems detailed were either incredibly slight, or as with most of them, impossible to fix or achieve the desired results using cinema 4D, especially at such a late stage of development.

Thursday, 4 November 2010

Work related brief


just a quick screenshot to show how the simplified carrots look for the work related brief.

robot update


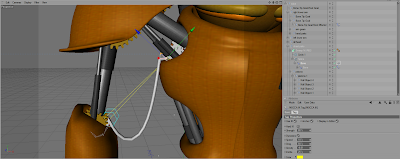
While doing the work related brief i managed to finish off the rigging for my characters arm, for this i've used two IK chains. One going for inside the chest to the shoulder and top of the arm, and them one going to the wrist. This gives the movement i want for the shoulder and looks quite good.

new week timetable


This timetable is for next week and hopefully i will be able to stick to this one. This is the last week on the work related brief and will hopefully be simply rendering and post production.

Carrot dynamics tests

Today I worked on getting the physics right for the carrot as part of the animation needs a lot of carrots to fall on the character. I had to simplify the carrot as much as possible without it looking bad so it would actually work with cinema 4D's dynamics engine. I replaced the carrots "leaves" with a simpler group of 3 flat polygons.

I found out that the way the dynamics work, when you've got the things that fall to move how you want them to, you can bake the solver object which basically keyframes the affected objects as they play through using the gravity. This means the objects can play through using keyframes so they move at the same speed as any other object, which helps with both testing play throughs and rendering.

this week timetable


although slightly late this is the timetable showing what was planned for this week.

late updates

I haven't updated in a while mainly because my plans and work were upset slightly when myself and 3 others in the class were given a live brief for the company Kurodragon. So for the most part my other briefs have been put on hold to work on the work related brief.

So far on this brief we have made all the models, the character which is a rabbit has been rigged and textured, and it has also been altered several times due to changes we were told to make late on in the process. Either way at this point animating has started, and hopefully everything will be done soon so we can start rendering it out. The character animation has been left to Rachel so the rest of us mainly have to sort out the smaller things in the animation.

Friday, 15 October 2010

next week plan - timetable

This week i plan to finish rigging my character and get my script/storyboard sorted. As well as doing some PPD work.

Thursday, 14 October 2010

Foot/leg rigging sliders


The next thing ive pretty much worked out this week is how to rig my characters foot. The Rigging guide i have from last year shows how to make a bone set up for a foot that can roll forward on the ball of its foot, but this year that set up doesn't have enough points/bones to work perfectly with my character. So i had to find a way around the problem, initially i was going to have a go at just altering the xpresso set up to do the same thing with an extra joint in there, which i think is possibly but would be time consuming, so instead i decided to try to make a separate slider which will sit in the foot controller next to the foot roll slider to make it easy to animate. The extra slider will rotate the upper section of my character foot, because at the minute, the normal foot roll moves both sections of the foot at the same time and by the same amount. By having this extra slider, both segments of the foot will move at the same time, but the upper section needs to rotate slightly more to look right. Ive tested to see if this will work and had no problems getting it to work, i just added a user data to the object that would be the controller, and i set up a range mapper in expresso and told it i wanted it to affect the foot segment and set up with direction he foot should rotate in.

rigging my character soft ik


To make the tube parts of my character hang and move under their own gravity i had to work out how to set up a soft ik bone chain to affect the splines, and working out how to make the two ends hang between different objects.

Getting this to work is quite easy, I spimply made my spline and put it in a sweep nurbs with a circle to make a tube. Then used the bone tool to create a chain of bones along the spline. Then i placed the bones in the spline, and i unchecked the smart bone option aswell as changing the function drop down box as this setting pretty much effects how much the spline droops or how harsh the curve and the tolerance in the chain is. After this i fixed the bones in place, and used the setup IK chain option. In the IK settings i turned hard IK off and turned dynamics on. Doing this makes a spline that can hang under its own gravity and move realistically. To make the bones hang between two different objects i just placed the goal object inside the object i wanted the chain to hang between and the chain itself was placed in the other object, in my case this is the chest.

blog update

Last week i got my script pretty much in order, and ive done a bit on my storyboards today, but both need a little bit of tweaking.

This week ive been getting my Robot model in order to be rigged and working out how to go about rigging each part of my character. Through the week i finished off some of the last details of my character, but my plan to add rivets to its body didn't work because i started getting random lines and stretching textures coming from my character. I'm not sure if this was because the rivets messed something up, the polys were too high, I'd placed something in the wrong place in the hierarchy, or it was just my cinema 4D being strange. Either way I'm going without the rivets for now and will add them later, possibly as textures.

Other than sorting out the last details, i had to spend some time splitting the symmetry's apart and optimising my character, which took a which because i need all the parts of my character to be separate objects, and all the symmetry's converted to objects that were joined together, and deleting the other halves to make single object left a lot of blank points. So i went through each part of my character an optimized it to remove the unwanted points. Now that my character is all separate all that is left to do is get all the axis' in the right place so the objects move properly when rigged.

Other that making my character riggable, ive been working out how to rig it up.

Saturday, 9 October 2010

robot eyelid shutters

Since I need shutter eyelids on my robot to show expressions, i thought i should get this done now so my model sheet is good to go whenever i need it.

to get the shutters to work my first idea was to use morph tags so that i could move the points and hide them inside the goggles and have the shutters morph out. I decided this was a stupid idea quite quickly as it was tedious and wouldn't work. Then i had the idea to use a boole object to hide the shutter when its outside of the goggle so it wont show in the render. I used a torus object since i decided it was a good enough primitive for it, and made it the right size. I think this works perfectly and should animate well, giving a good amount of movement on the eyelid.


Thursday, 7 October 2010

HDRI render


While researching animaiton techniques i looked at HDRI lighting and decided to try it in a scene with my character. Apart from looking a bit plasticy, im really pleased and impressed with the result. It's a shame i couldn't use HDRI in my animation, this still of my character by himself took 20 minutes.

first week of second brief

Its the end of the first week of the second brief and i haven't done much work on my blog, as i chose to make my character in 3D for my model sheets doing that and keeping up with other things is taking up a lot of my time, and keeping up a little difficult. Either way This week i got all my research done, i looked at various 3D animations and animation techniques, I still need to finish my script and get that in order but im fairly sure ill have that done no problems. Despite thinking i may be a little behind on some things, the fact my character is modelled and nearly finished may help me make up some time which i would have used in the next few weeks, but theres still work to do on that, such as rigging.

I'm going to try to catch up on some of the things i need to over the weekend a bit, and should be on track for Monday.

robot progress

At his point my robot is almost dont, he needs some things changing and some different textures, but other than that it is mainly adding rivets and small deatils.

textures, steam pipes and goggles

After getting the larger parts of the robot right i started working on getting the texture right, which i think like this is near enough how i want it before adding rust and smaller details.

I added steam pipes on his back and a part to make it look fixed to his back. I worked on getting the goggles right next, by working out how to make and animate an aperture shutter. It turned out after working out that to animate the aperture i would need to rotate the axis, that to animate it, i needed point level animation switched on. I placed a clow texture behind the shutter and left it at that, still needs some kind of eye lid shutters to hep get expressions across.

I added arms to my character and segmented hands. Not sure of the scaling at this point as the arms look too long and skinny.


When i had got my robots torso to look right i started work on the feet. The feet once again were all box modelled starting with cubes and moving the points, and then being placed in a hypernurbs. I had used a symetry object for each segment of the feet, and i liked the way the split feet looked, so i was unsure if i should leave the split down the centre of the foot. I ended up leaving the split foot on the middle two sections.
I got the shape roughly right before tweaking the shape more. I decided that the neck line should be tilted forward more so that the head was set back into the torso more. I also added pistons to see how it would look at this point.
After several more alterations i extruded the holes to give a thickness to the body.


I started on the robots torso next, and added in a sphere to be a place holder for the head to get the scale right. The sphere started as a cube with several subdivisions which I made editable and moved the points into place. I made holes by deleting some polygons and continued modelling
the torso by extruding upwards and moving points.

robot progress


I started my robot based on some very basic elevations i drew which at least helped with the scaling.

Initially I modelled the shoulders, I did this by basically box modelling, I started with a sphere which I cut in half and moved the points into place. I then extruded the object several times to get the shape I wanted, then the shoulder was placed in a hypernurbs and a symmetry object.

Friday, 1 October 2010

Back to college

This is my first post since before the summer, and i will be posting some updates to get my blog up to date.

During the summer i did some work comming up with my idea for the task we were set for the summer. My character idea is a steam powered steampunk style robot. My initial idea was that somehow the robot gains powered through a strange energy source being gathered by an alien race.

Since returning to college my idea has developed and progressed as i felt my initial idea was quite cheesy and generic. But i have kept the initial concept of a steam powered robot in an industrial steam powered world.

Now the idea has progressed into a robot that is now coin activated, and a coin finds its way into the robot and powers it on, and the robot proceeds to walk around and expolre seeing the estroyed world around him that is so different to what he remembered.

After getting my idea for my character down and developing some of my concept drawings, dave said it would be a good idea to do my model sheet in 3D, and i liked the idea, so i had to make my character in 3D which i knew would be quite time consuming.

I will post some pictures now to sow the progression of my 3D model and how its coming along so far.

Thursday, 13 May 2010

chrome material base


http://hidlen.deviantart.com/art/WEDDING-RING-71551313

i found this tutorial that shows howto create and texture some wedding rings, the modeling wasn't helpful but the chrome texture did as i used it on my safe.

I used the settings i found here as a base and modified the texture to suit my needs by adding a radial reflection, and changing the base colour to black for a shiny black metal.

thursday night


It's the end of thursday and it looks like i should be ok to hand in on time. i have complete my animation, my model sheet, my storyboards and everything else i planned to in my time plan, but it's taken a lot of time.

my cinema 4D crashed during my final render so ill have to settle for a lower quality one, although i did alter the lgihting to make it look as good as i could.

my time managment this week has been very good, which is a change, but i did plan to do a lot of work.

Wednesday, 12 May 2010

lemony snicket - unfortunate events


I decided to look at this video of the film by lemony snicket, a series of unfortunate events. The environments and setting of this film were originally what i wanted my character to be set in, and i wanted him to have an excentric was of acting like the charactrer count olaf.

heavy rain video


As i looked at heavy rain in my character aniamtion research i thought i should add a video showing some of the character aniamtiont o my blog. Heavy rain is a game for PS3 about a killer and shows the story from several different peoples perspectives, a victims father, a Private investigator, a newspaper editor, and an FBI agent. The games story is very character driven and to ensure this is top quality they made their voice actors go through every scene in motion capture to make the movements as realistic as possible aswell as motion capturing every voice scene/conversation.

The charcters are quite well done, and the story is very interesting, the characters express themselves well but the fbi ages constantly looks confused when i think the expression they were going for was thinking.

other than that the character modeling and aniamtion are brilliant, but the voice acting isnt great, and kind of throws off the realism of the characters.

video collection of 3d character work - youtube


i found this video which has a colleciton of 3D character work, which all varies in quality. Most of it is quite good, but the first aniamtion shown i feel the texturing is quite bad, the colours are too bringt and done work with the background aswell as having no real shadows or self shading. There is some aniamtion of the hulk there two which i assume was from a game gameplay cutscene, which although brief looked quite good with what i would concider several years old graphics for a currect generation console.

The last aniamtion they is seen is my favorite and why i added this video, the character looks well made and is textured well, he has soft shadowing which i guess is some kind of ambient occlusion. His movements are smooth and his arm and hand seem to move well and smoothly which makes me thing his hands are rigged with bones. his facial features are my favorite part, large parts of his face move as he talks and his jaw and the whole lower part of his face move side to side as he speaks which i like and would like to find otu how it is done.


I foudn this aniamtion and decided to post it. I think the character design of the blue goblin is quite good, and the face has some nice complexity to it. the aniamtion runs to a soundclip of the film 300. The models might be ok, but the animation, esspecially to start with, is jumpy and doesnt look right at all to me, and the movements dont flow well and dont have speed or strength behind them, and there is no follow through on movements.

The facial expressions dont change much and the talking look quite bad, the mouth movement is simple the jaw being lowered with very little movement to the lips or mouth shape, other than it being stretched outward to make it smile.

I really dislike the camera work as it moves at the rate the character does as he moves around which takes even more out of the speed and power of the movements. this might be because he was trying to keep it as much like the film 300 as possibl ebut as there are no background elements and no oponent it it just looks wrong.

another mecha


I decided to look at another mecha model as a comparison, this one is much less complex and has a lower polygon count, but i feel its not much worse, the design is less generic, more original and has better proportions, for those reasons i prefer this one, but if i had the choice to model either of those myself i could combine their different qualities, the design and inventive legs of this one, but the detail and exposed pistons and cables of the last one.

mecha model i found


i found this mecha model someone has made, i liked the complexity in the modeling. The model is very complex and looks quite good, but it looks quite old fashioned for a mecha, and kind of out of proportion, i think it might be a bit too wide based on how thin it is from a side view.

spider robot aniamtion


I found this animation of a spider robot with 6 legs. I love the quality of this work, the motions are very smooth and there is no unintended, sliding as it moves. The robot was made a rigged up using 3Ds max and was rendered with an external renderer called brazil, which seems to have added the ambient occlusion effects. I think the ant-aliasing settings in the renderer must be quite high as it looks nicely defined and has a high resolution even on youtube.

samsung 3D LED tv ad


I loved this advert for the new samsung 3D led tv. I think its very nicely made, with some impressive effects, 3D work, composited effects and post productionwork.

bitey or brackenwood - prowlies


I have looked at adam phillips work several time for college research and his characters always come back to me as they are well designed, they dont talk, but express themselves through well aniamted movements and facial expressions. bitey (a strange horned, humanoid character) shows hes happy with a sinister smile, which i felt related to my own character design.

The creator gets his personality across well showing that he is a mischiveous creature, that uses his impressive speed to mess with other creatures in his forest.

Mask animation


I found this animation a long time ago on newgrounds.com and liked the character work and more importantly the aniamtion. The creator, jeffrey liu, said at the time it was made for a film festival, and it was unfinished, but i think the concept/ rough style really makes the animation. I love how each frame is drawn and is very accurate.

Although there is no dialogue and the character is unknown i think the character himself is quite well done and has a strong presence and impact.

lego men expressions


I found this video when looking for reference on character expressions. I think that legomen express themselves reasonably well, with such limited movement. Their facial expressions are done using 2D textures placed on their faces.

morph tag testing


I rendered out a demonstration of all my morph tags, i think they all look quite good and express the emotion they are supposed to quite well. the face uses 4 morph tags to make verythign move at one, 2 on the teeth, 1 on eyebrows, and one on the main face mesh.

The facial expressions are a little fast but i wanted to keep the rendering and uploading times down. the face goes from default which is happy, to sinister, then he does some eye motions, then angry, shocked, sad, scared and back to normal.

The hands are simply manipulated to move in stages to reach their end goal.

morph tags - hands

I added the morph tags for the hands next.

Since morph tags to keep the length and sie of the polygons the same as the default the movements can stretch the polygons in annoying ways, which is why you add tags in different stages of the movements.

i added tags so that the hands can open and close, the thumb cane move too.

The main tags on the hands for me are that tags i added to allow the character to twiddle his mustache.

I added an extra tag to move his thumb and finger to make a twiddling action.


Adding morph tags - facial features

I started adding morph tags to my character, I started with facial features.

I added morph tags by clicking morph in the charcter tags dropdown menu. Adding morphs is quite easy, you add a tag and then alter your mesh to that point you want it to move. This is best used for faces as on other things it can produce unwanted movements and polygon stretching.


I added several exressions to my charcter, happy (default face), sad, angry, shocked, scared, and one which i call sinister which is a slightly more evil version of his default face, which is what i plan to use in my animation.

I added morph tags to the eyebrows and teeth to match the expressions i made for the face.


full model still render

I rendered out this still of my full finished mesh.

I'm quite pleased with the final result, the texturing could have been better but i feel its good enough.

the face is quite good but because of a slightly awkward polygon arrangement in places it was difficult to morph tag.
I made some textures for the dynamite.

The red texture i made usinga red colour, specular is turned down slightly, and i found an appropriate bump map which turned the strength down.

I made a spark texture by placing the fine shader in the alpha and colour channels, and i turned the glow channel on and increased the strength to make the spark i wanted.

Added dynamite

I modeled a stick of dynamite which i need for my aniamtion.

I made it simply bu dropping a sized up cylinder into an array. I added the string with sweep nurbs which i place din another array.

Finished safe model


This is my finished safe rendered out, it looks pretty much perfect to me and im pleased with it, esspecially the reflections and materials i used on the dial. I did want to add numbers or notches to the dial but i felt that wasnt needed.

Modeling safe

for my animation i decided i needed a safe as an asset. I modeled this quite simply.

I started by making a cube, which i then smooth shifted to add a extra polygon as a slope around all the edges.

I then used the inner extrude tool to make the crease for the door. I used the knife tool to cut a line round the door to make it look more realistic.

I then used the extrude tool to bring it in a bit, inner extruded again, and extruded once more to make the door.

After making the basic shape for the safe i added hinges on the side of the door, which i made by smooth shifting a cube and placing it in a hypernurbs object.

I made a safe dial by manipulating and extruding a cylinder.

i made the handles in the same way as the dial, but i used an array to make the 3 bars evenly spaced.


To finish it off i needed to add textures, this took a bit of testing, to find a suitable shiny metal/chrome texture i looked online at some tutorials, and adapted the textures i found to suit what i wanted.

i made the textures for the dial using different gradients, on vertical one, and one radial, the rest of the dial was a black shiny metal texture i made which i tried to blend in with the shinier gradient parts.